Providing access to your Account Manager on Facebook Business Manager is simple. The tutorial below will guide you step by step.
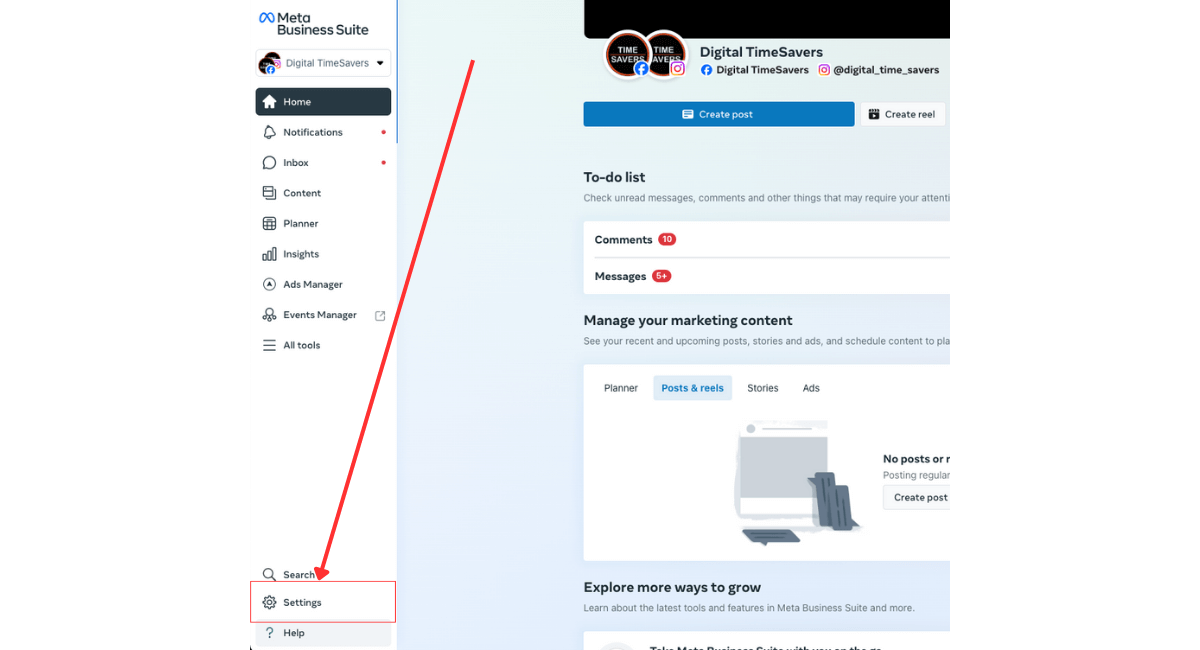
- Navigate to Facebook Business Manager
- Click on “Settings” [located on the bottom left]
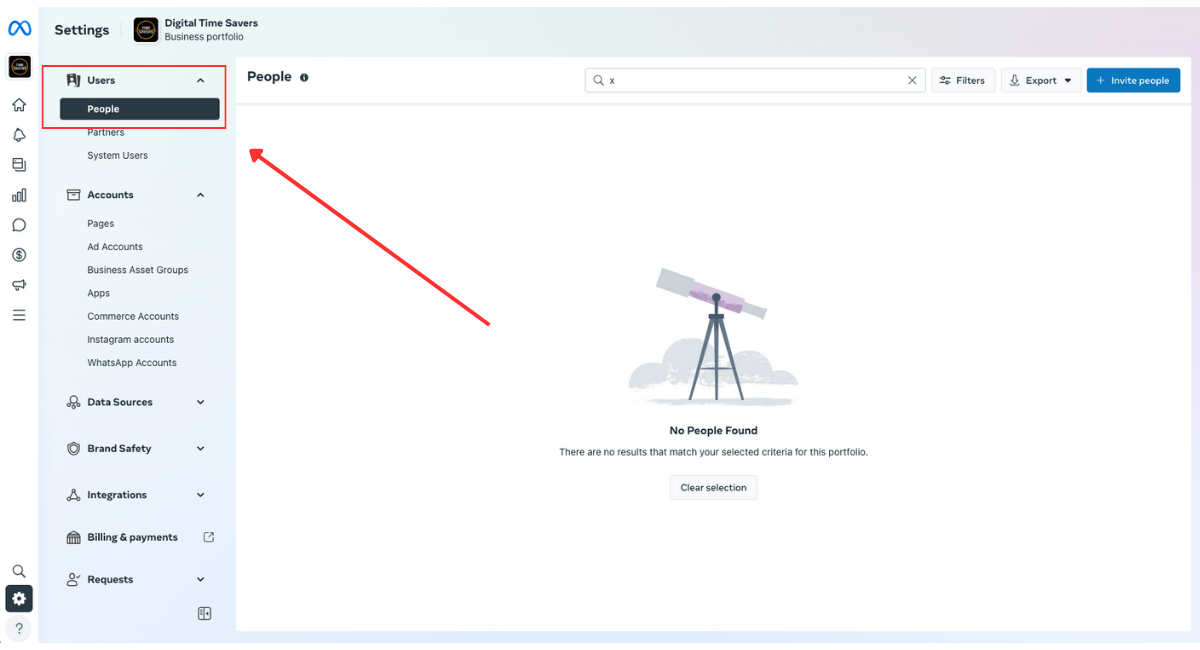
- Proceed to Users > People
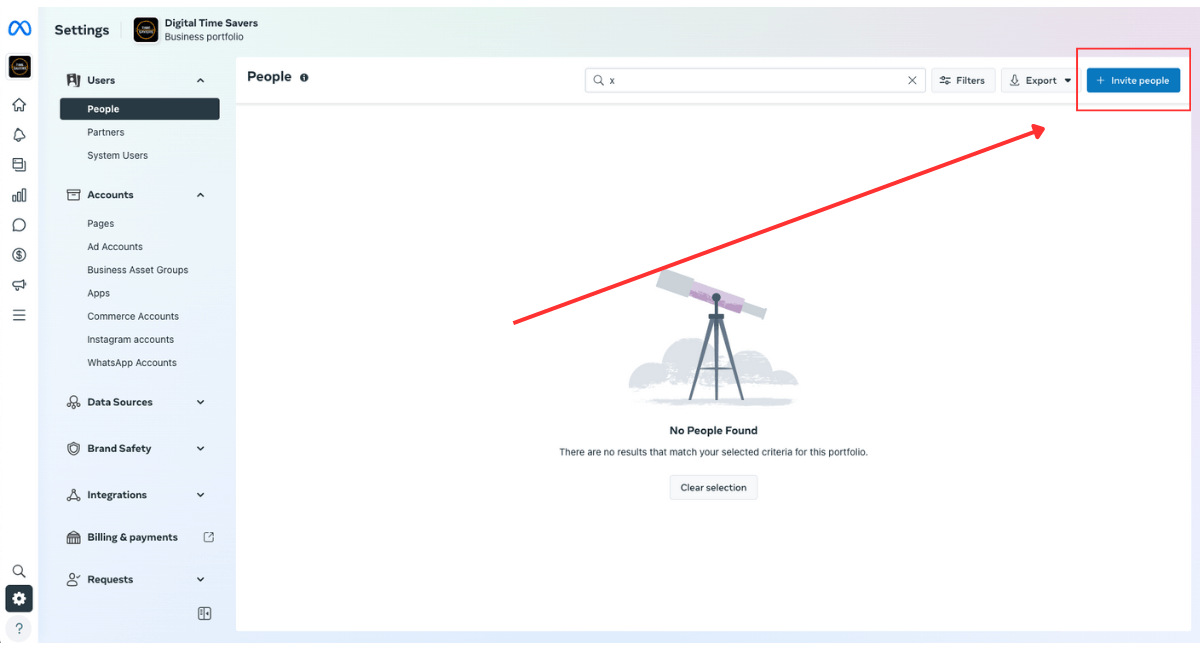
- Click on “Invite People” [located on the top right]
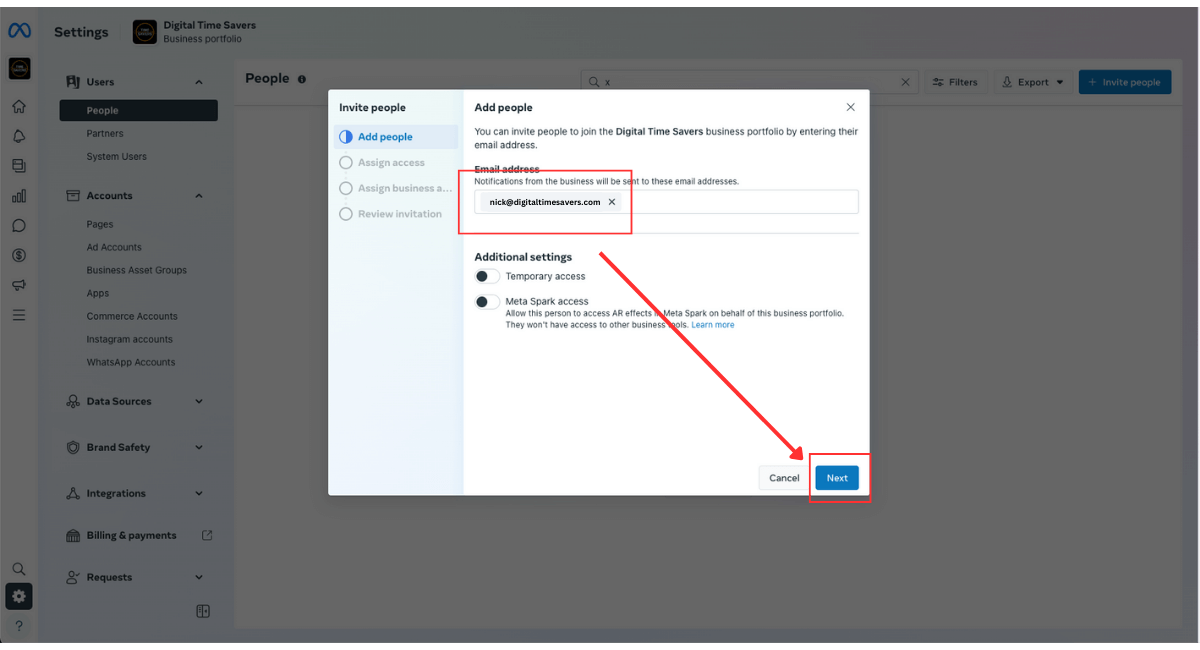
- In the email field enter “[email protected]” and click “NEXT”
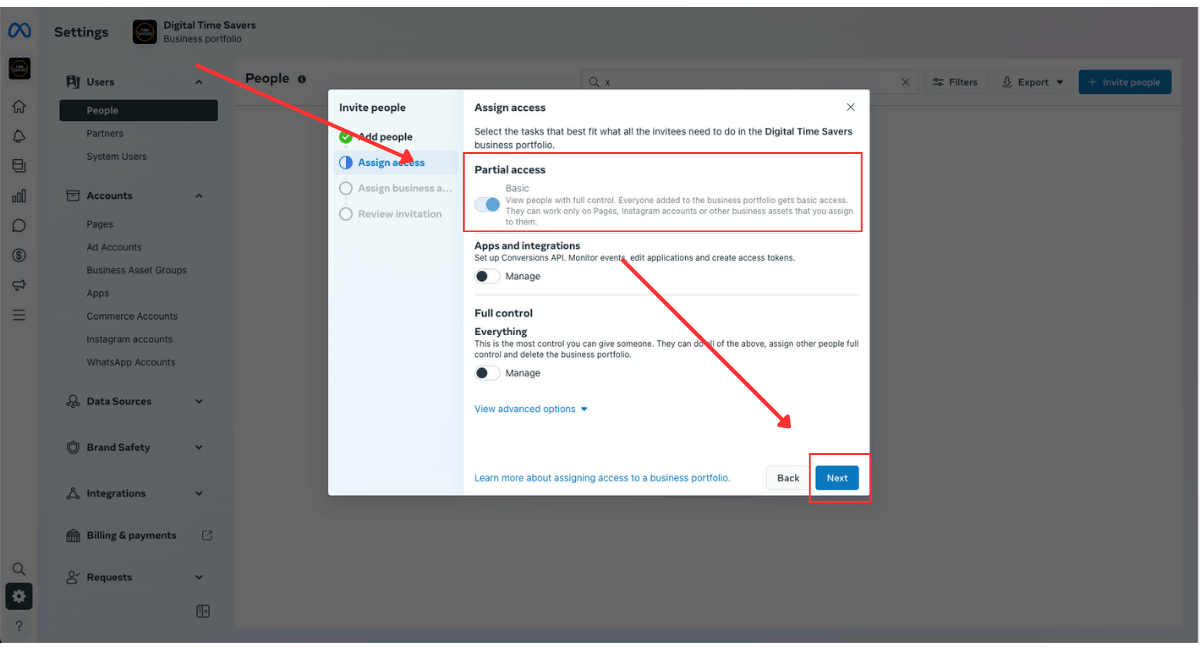
- In the Assets menu select “Partial Access – Basic” and click “NEXT”
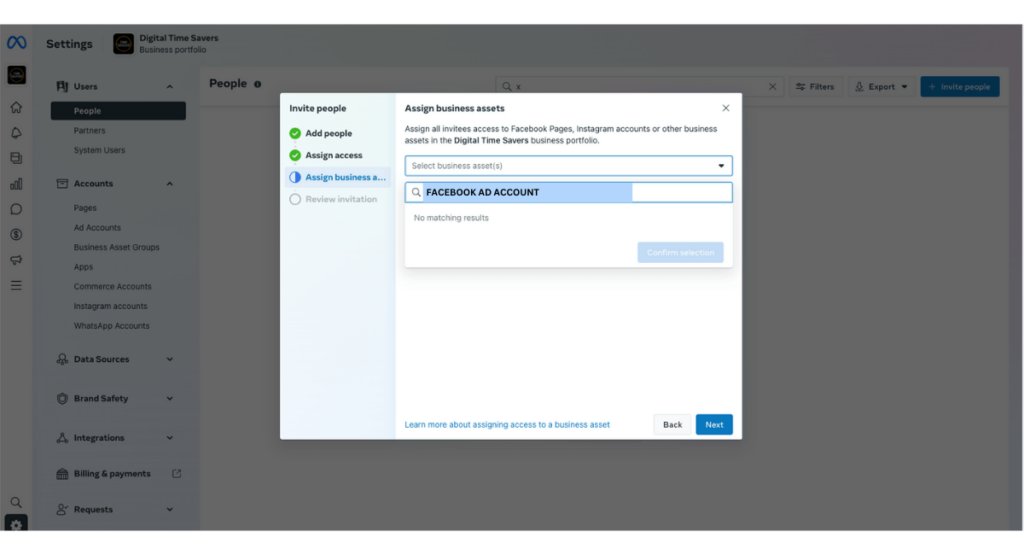
- Search for your “Facebook Ad Account”
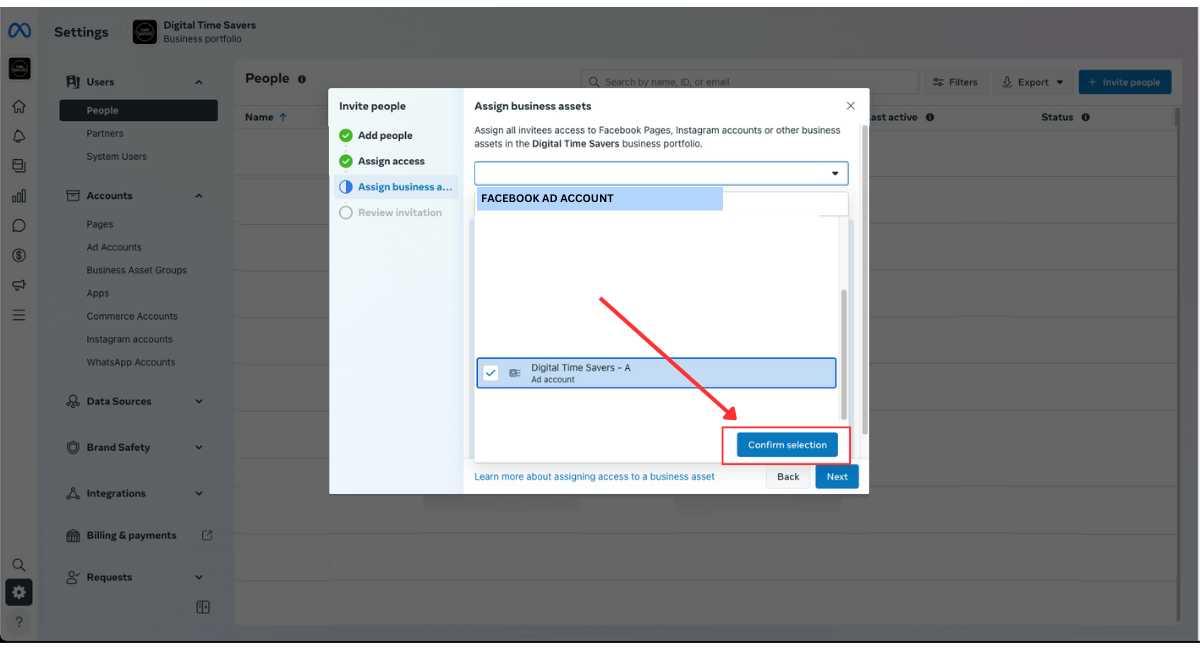
- Find and Select your “Facebook Ad Account” from the list and then click “Confirm Selection”
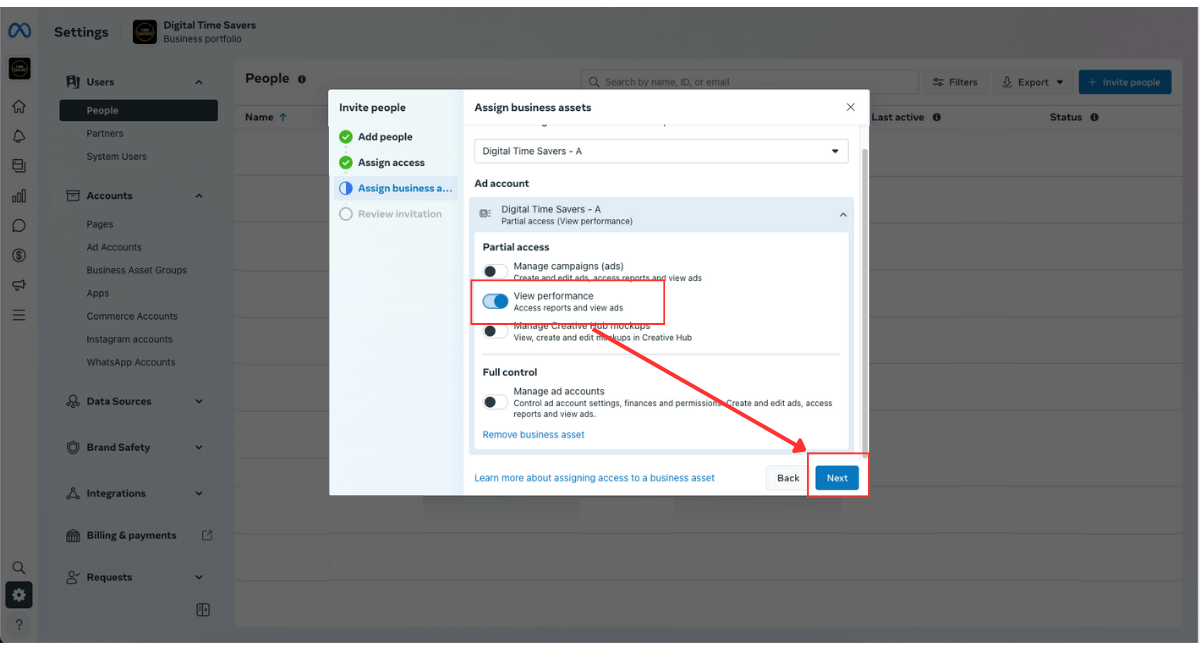
- On the new menu that will appear in the “Partial Access” section, select “View Performance” and click “NEXT”
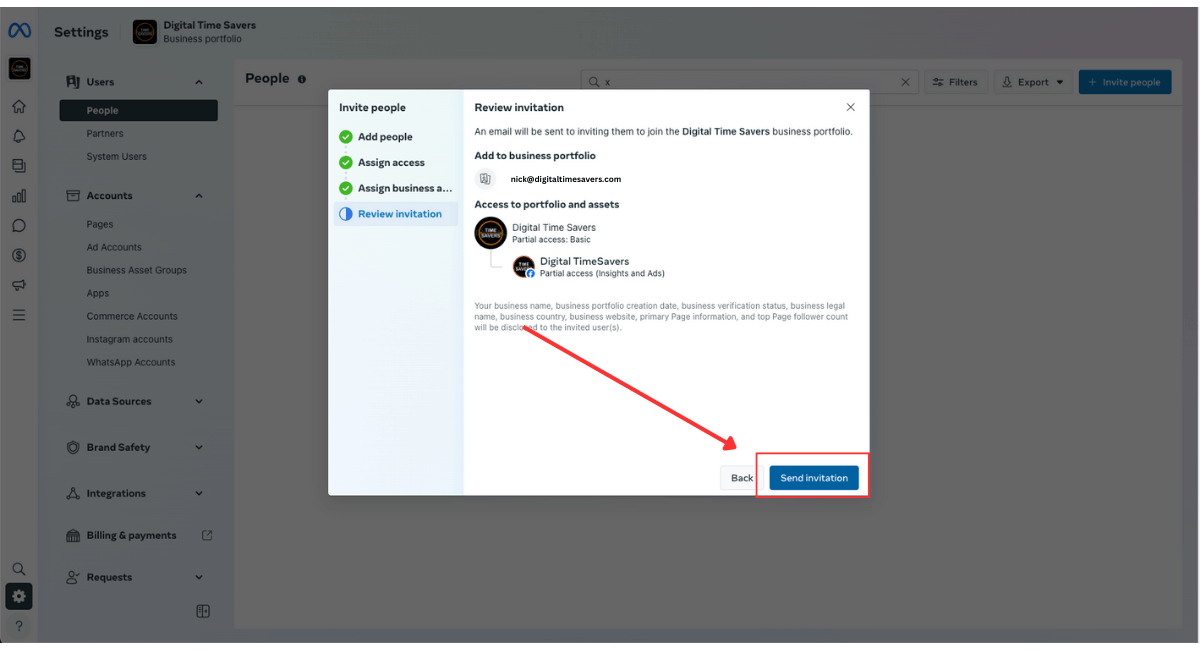
- On the final step, review that the email address is correct [[email protected]] and you’ve provided access to the correct “Ad Account” and “Access Level”, then click “SEND INVITATION”